EconLearn
Log in πŸ‘€
Home β€Ί Diagrams

πŸ–Ό All Diagrams (22)

Every graph and diagram of the chapter in one place. Tap a picture to see it big, or open its lesson to read β€œHow to read this graph”.

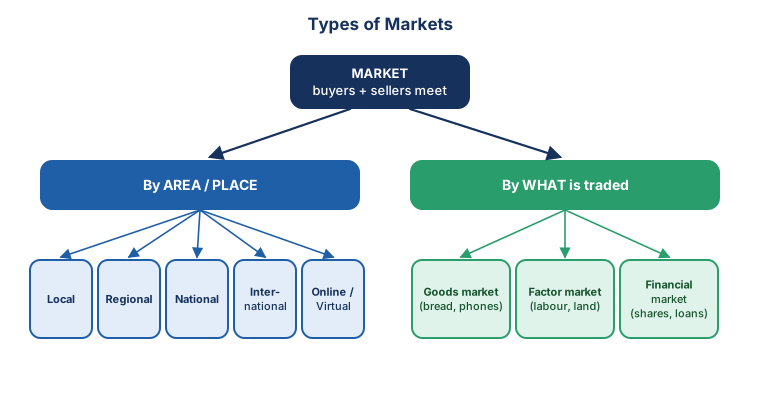
Figure 1.1 – Types of markets
Open lesson: Market Environment β†’
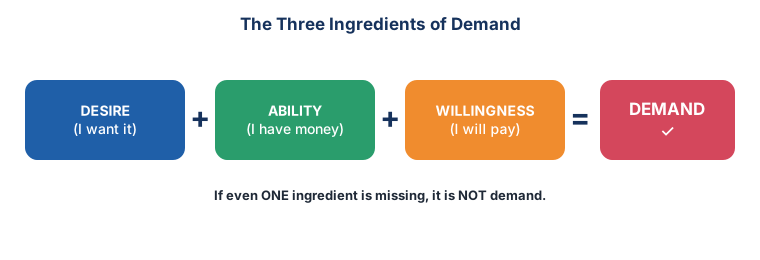
Figure 2.1 – The three ingredients of demand
Open lesson: Demand & the Law of Demand β†’
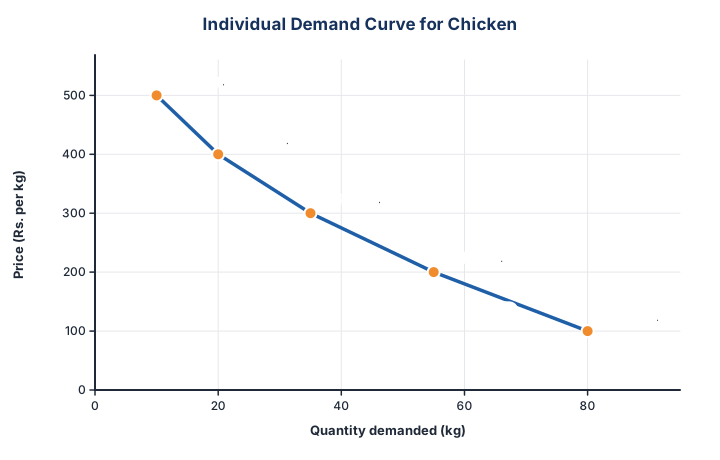
Figure 2.2 – Individual demand curve for chicken (drawn from the table)
Open lesson: Demand & the Law of Demand β†’
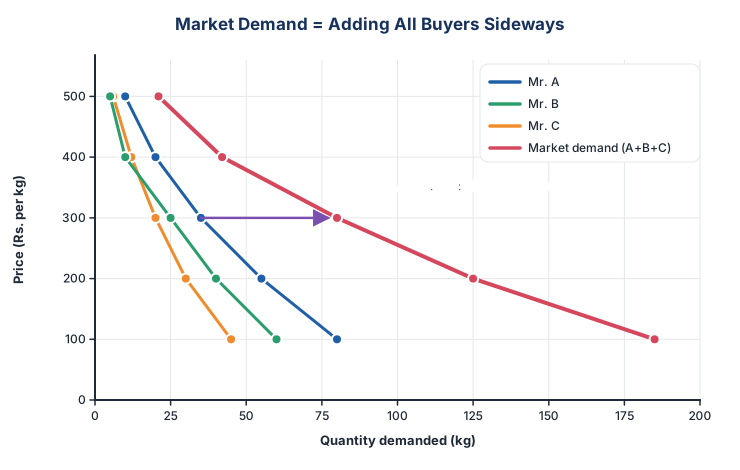
Figure 2.3 – Market demand is found by adding quantities sideways
Open lesson: Market Demand & Exceptions β†’
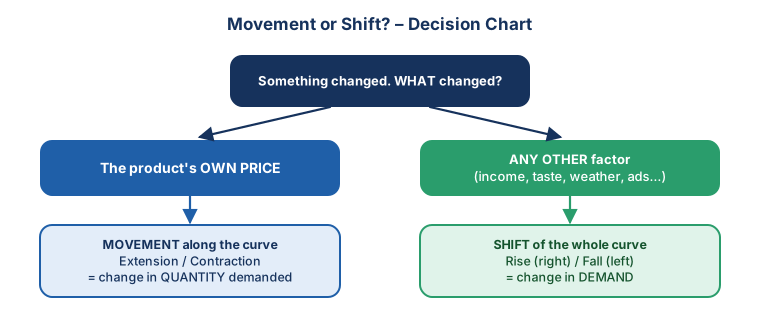
Figure 2.4 – Decision chart: movement or shift?
Open lesson: Movement Along vs Shift of the Demand Curve β†’
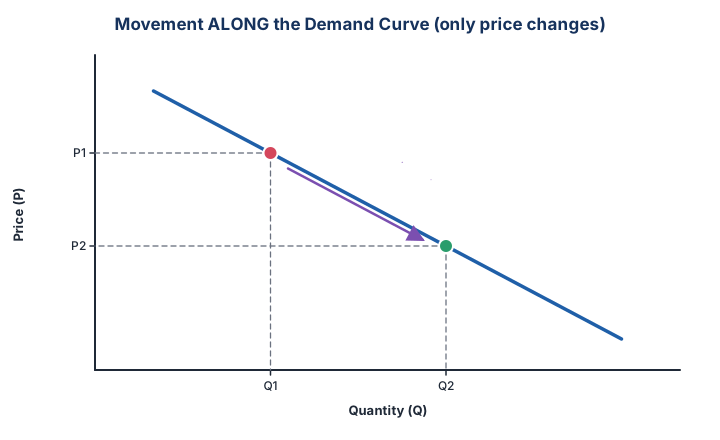
Figure 2.5 – Movement along the demand curve (room coolers)
Open lesson: Movement Along vs Shift of the Demand Curve β†’
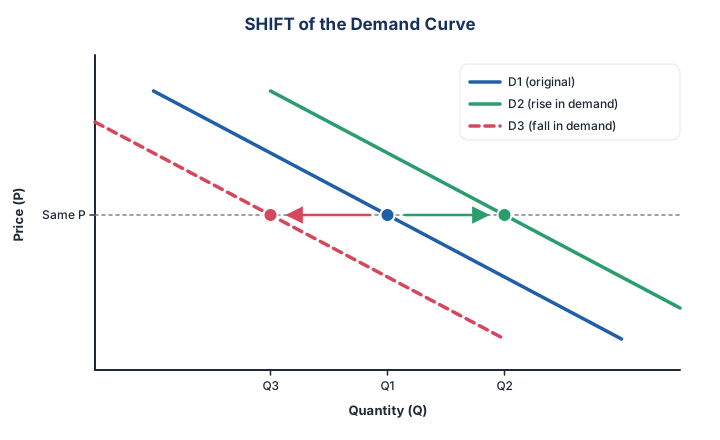
Figure 2.6 – Shift of the demand curve
Open lesson: Movement Along vs Shift of the Demand Curve β†’
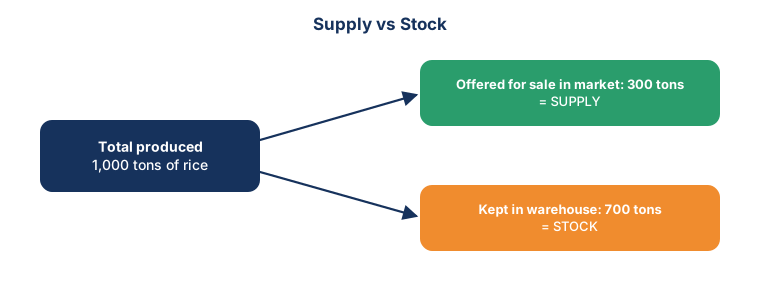
Figure 3.1 – Supply vs Stock
Open lesson: Supply & the Law of Supply β†’
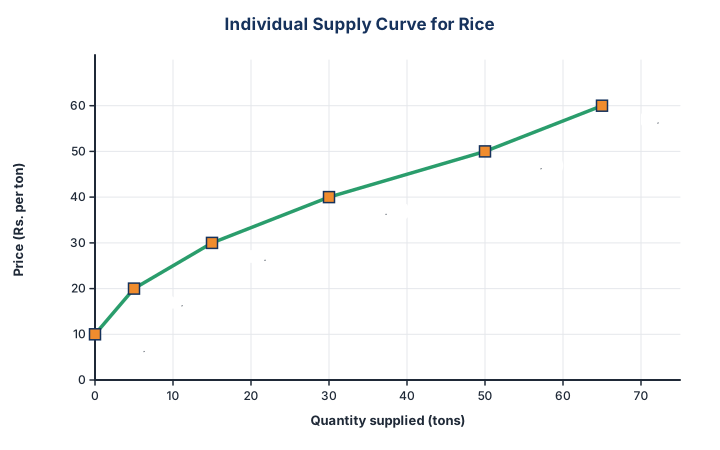
Figure 3.2 – Individual supply curve for rice
Open lesson: Supply & the Law of Supply β†’
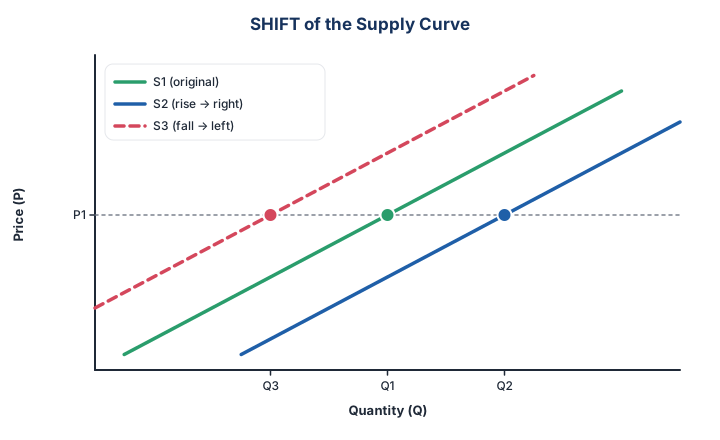
Figure 3.3 – Shift of the supply curve
Open lesson: Supply & the Law of Supply β†’
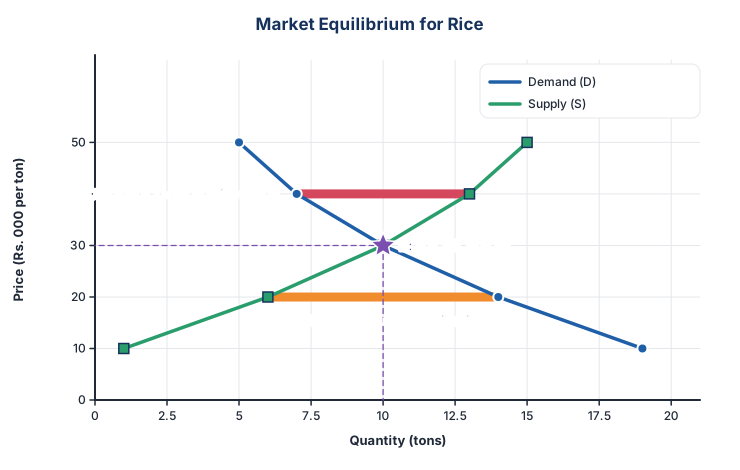
Figure 4.1 – Equilibrium in the rice market
Open lesson: Price Determination & Market Equilibrium β†’
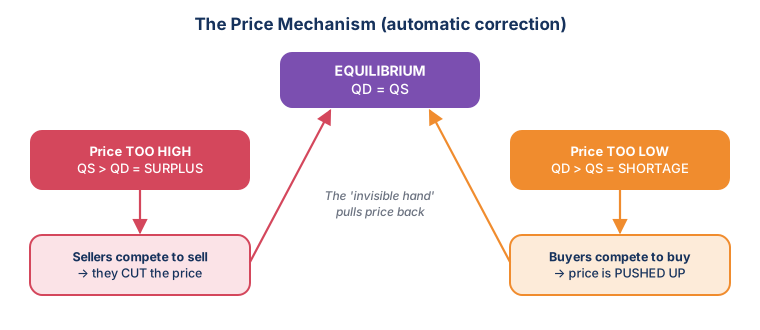
Figure 4.2 – The price mechanism (automatic correction)
Open lesson: Price Determination & Market Equilibrium β†’
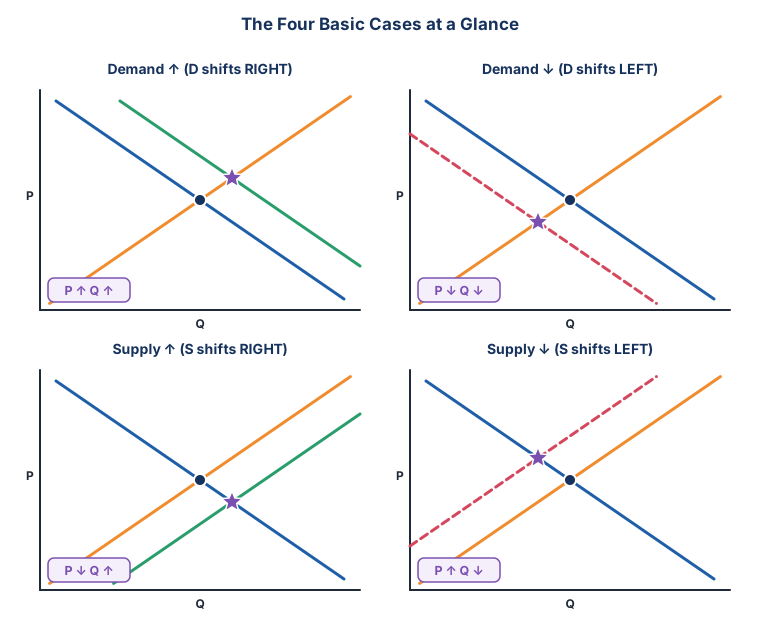
Figure 5.1 – The four basic cases at a glance (dot = old equilibrium, star = new)
Open lesson: Shifts in Demand & Supply β†’
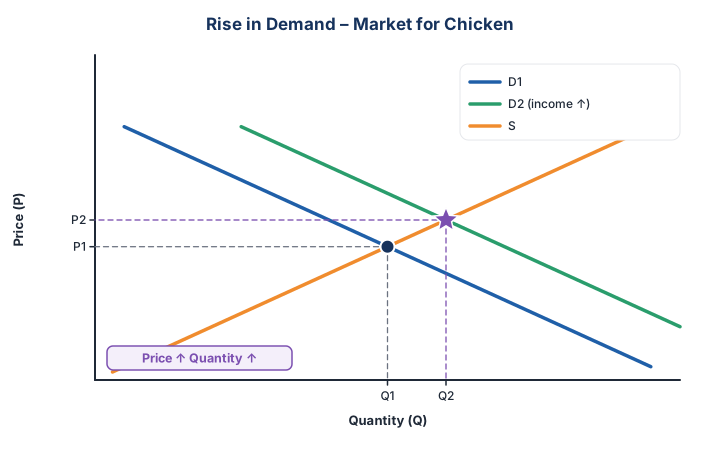
Figure 5.2 – Rise in demand
Open lesson: Shifts in Demand & Supply β†’
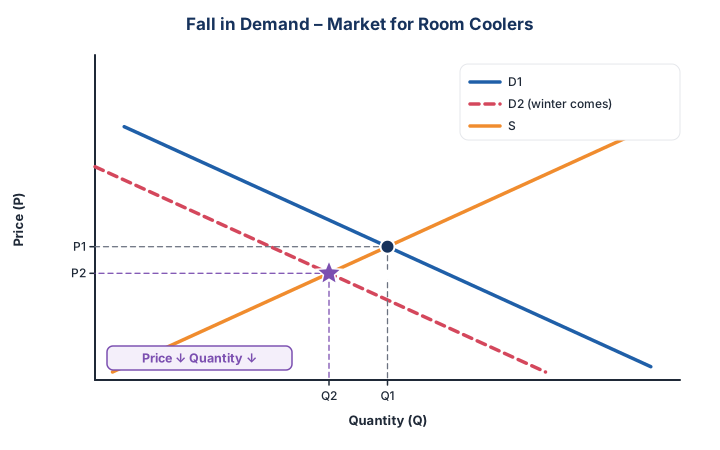
Figure 5.3 – Fall in demand
Open lesson: Shifts in Demand & Supply β†’
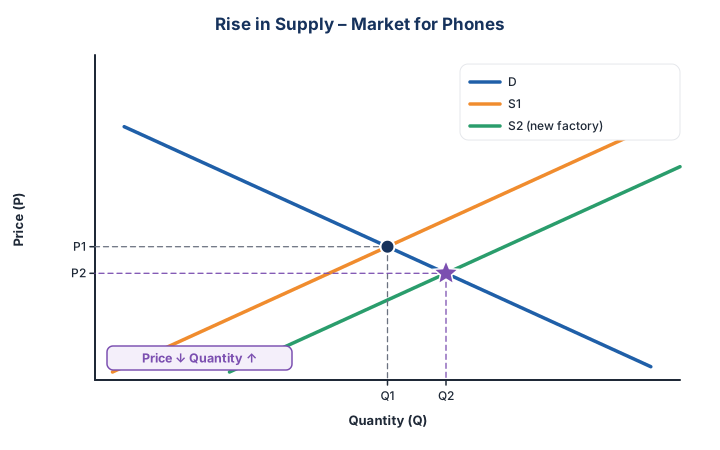
Figure 5.4 – Rise in supply
Open lesson: Shifts in Demand & Supply β†’
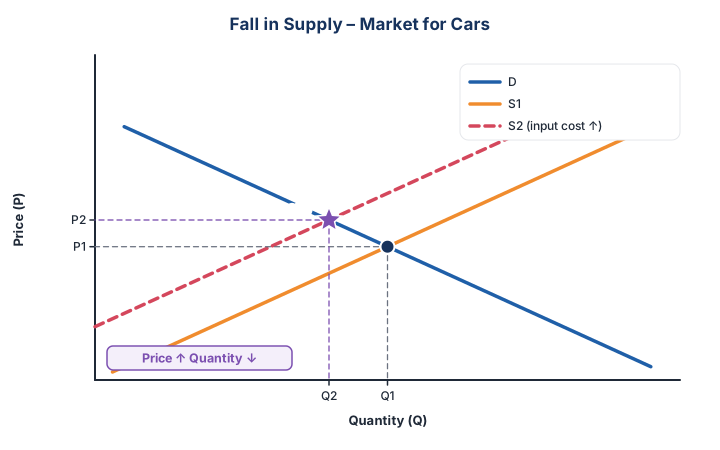
Figure 5.5 – Fall in supply
Open lesson: Shifts in Demand & Supply β†’
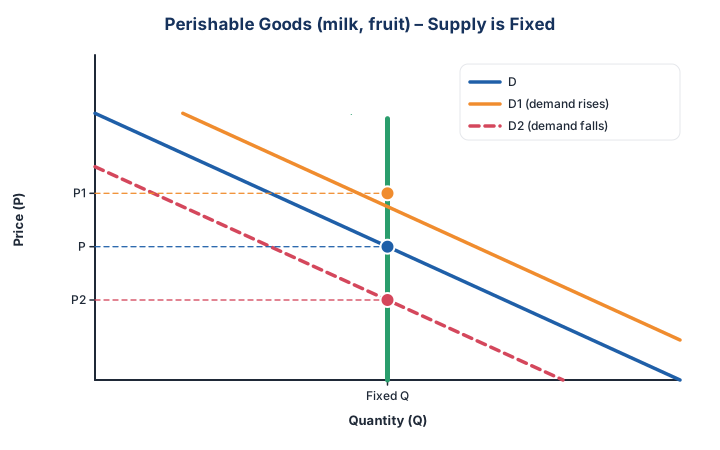
Figure 5.6 – Perishable goods
Open lesson: Perishable vs Durable Goods, Reservation Price & Price Instability β†’
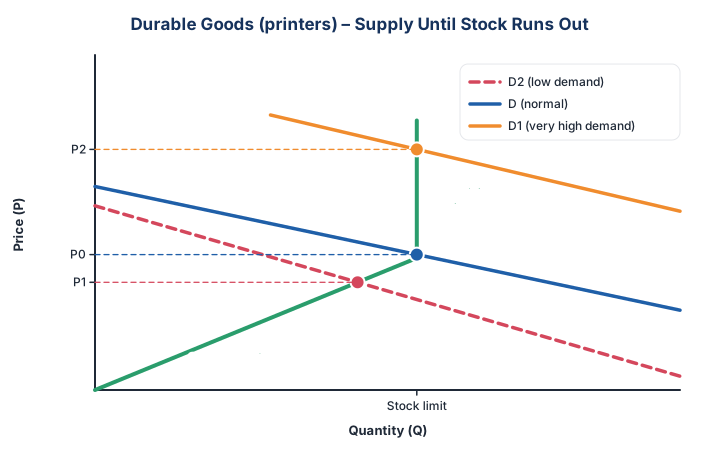
Figure 5.7 – Durable goods (printers)
Open lesson: Perishable vs Durable Goods, Reservation Price & Price Instability β†’
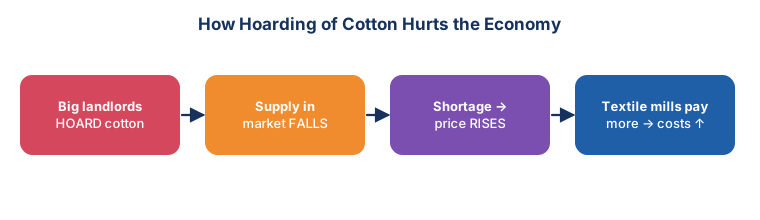
Figure 5.8 – How hoarding of cotton hurts the economy
Open lesson: Perishable vs Durable Goods, Reservation Price & Price Instability β†’
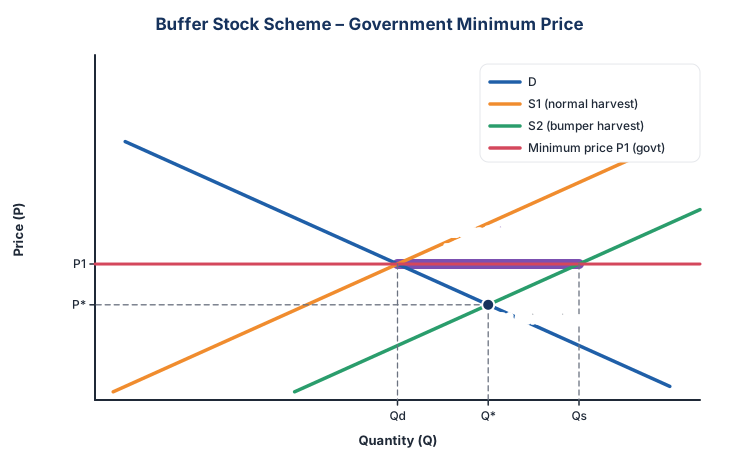
Figure 6.1 – How a buffer stock works
Open lesson: Government Policies for Price Stability β†’
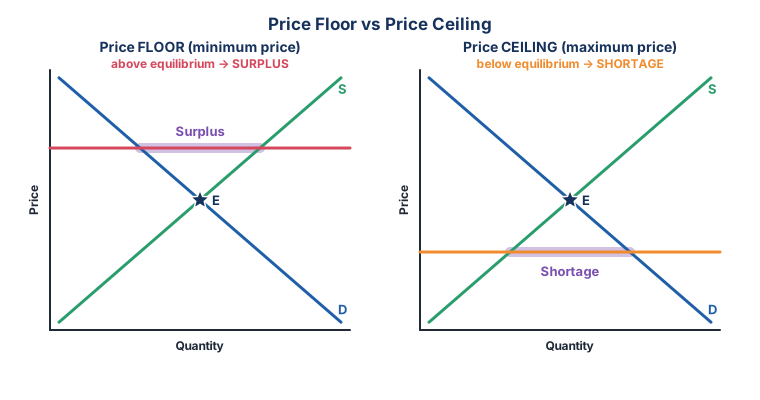
Figure 6.2 – Price floor vs price ceiling
Open lesson: Government Policies for Price Stability β†’